


The door seal on a front-load washer — the big rubber accordion between the door and the drum — is the hardest-working part in the machine. It’s called a boot gasket, or a bellow, depending on who you ask. It flexes on every spin cycle, holds back gallons of water, gets hit by zippers, buttons, coins, and the occasional bra underwire, and sits in a warm, wet, dark environment for a decade. Nobody thinks about it. Then one morning there’s water on the laundry room floor, or a smell in the towels that no amount of detergent fixes, and suddenly it’s the only thing you can think about.
I run appliance repair Sarasota calls for gasket work more than almost any other front-loader repair. Florida’s humidity is brutal on rubber. Mold sets in fast, and once it’s grown into the material, cleaning is a losing game. This guide covers the five signs your seal is done, what the replacement job involves, and how to make the new one last longer than the old one.
Sign One: Mold That Won’t Come Out
Black growth in the folds of the gasket is normal — every front-loader in Sarasota gets it eventually. Cleaning it is normal maintenance. But there’s a point where cleaning stops working, and that’s when the gasket needs to go.
Here’s how you know. You scrub the folds with a bleach solution, let it sit, scrub again, dry it thoroughly. Two days later the black is back. Or the stains never lifted at all — the rubber is permanently discolored, not just dirty.
That means the mold has grown into the rubber, not just on it. Its roots are in the pores of the material. You cannot bleach that out. You can kill the surface growth, and it will regrow from below, every time. The smell in your laundry comes back with it.
Sign Two: Water on the Floor
A leaking gasket is the second-most-common reason for replacement, and it’s the one that costs you money if you wait. The classic pattern: a puddle appears at the front of the machine, usually toward the bottom, and it shows up during the wash or spin cycle — not when the machine is idle. That timing matters. Water leaking when the washer is off points to an inlet valve, not the seal.
WHAT TO DO:
- Look at the bottom fold of the gasket with a flashlight while the drum is spinning.
- That lower section takes the most abuse and holds standing water between loads, so it’s where tears and pinholes show up first.
Sometimes there’s no visible hole at all. Deep mold pitting lets water wick through the rubber like a sponge. The seal looks intact and still leaks. Don’t sit on this one. A slow gasket leak soaks the subfloor, warps baseboards, and in a second-floor laundry room, ruins the ceiling below. Appliance repair in Sarasota FL techs see the water damage bill run three times the cost of the gasket more often than you’d think.
Sign Three: Visible Tears, Pinholes, and Cracks
This one’s straightforward.
WHAT TO DO:
- Pull the gasket folds open with your fingers and inspect the whole circumference under good light. Rotate around the full circle — top, sides, and especially the bottom.
- What you’re looking for: rips, splits at the fold line, holes worn through, and cracks radiating from a stress point. Underwires and coins cut the rubber. Zipper pulls abrade it. Over years, the constant flexing at the same crease line fatigues the material until it splits.
A tear means replacement. There is no patching a boot gasket. Rubber repair compounds don’t survive the flex and heat cycle, and anything you glue on becomes another mold trap. I’ve watched people try. It buys a few weeks.
Sign Four: Rubber That Feels Wrong
Healthy gasket rubber is firm, flexible, and springs back when you squeeze it. Aged or mold-damaged rubber tells you something’s wrong before you can see it.
WHAT TO DO:
- Run your fingers around the whole seal.
- Look for spots that feel spongy or soft, sections that have gone stiff and brittle, and areas where the surface texture has changed — rough or chalky instead of smooth.
- Spongy means the material has broken down and is absorbing water.
- Brittle means it’s about to crack.
- Either way the seal has lost the elasticity it needs to compress against the door and stay watertight.
Squeeze Test: Pinch a section of the rubber between two fingers and release. It should snap back immediately. If it stays deformed for a second, that section is done.
Sign Five: Clothes Snagging or Coming Out Dirty
An underrated sign. If shirts are coming out with small snags or pulls, check the gasket for a torn edge or a piece of debris embedded in the rubber. The drum spins clothes right against that seal.
And if laundry comes out with black flecks or smells worse than it went in, the gasket is shedding — degraded rubber and mold sloughing off into the load. At that point you’re not washing clothes, you’re marinating them.
Cleaning vs. Replacing — Where the Line Is
Clean it if: the mold is surface-level and comes off with a bleach solution, the rubber is firm everywhere, there are no tears, and the smell goes away after a deep clean plus a tub-clean cycle.
Replace it if: the stains don’t lift after two rounds of proper cleaning, the mold returns within days, there’s a tear or pinhole anywhere, the rubber is spongy, stiff, or pitted, or it’s leaking.
Simple rule: Сleaning fixes a dirty gasket. Nothing fixes a damaged one.
Most boot gaskets last five to ten years. In Sarasota’s climate — high humidity, laundry closets with no ventilation, and the habit of shutting the door after every load — I see them fail closer to the five-year end.
What the Replacement Job Actually Involves
Worth understanding before you decide whether to DIY.
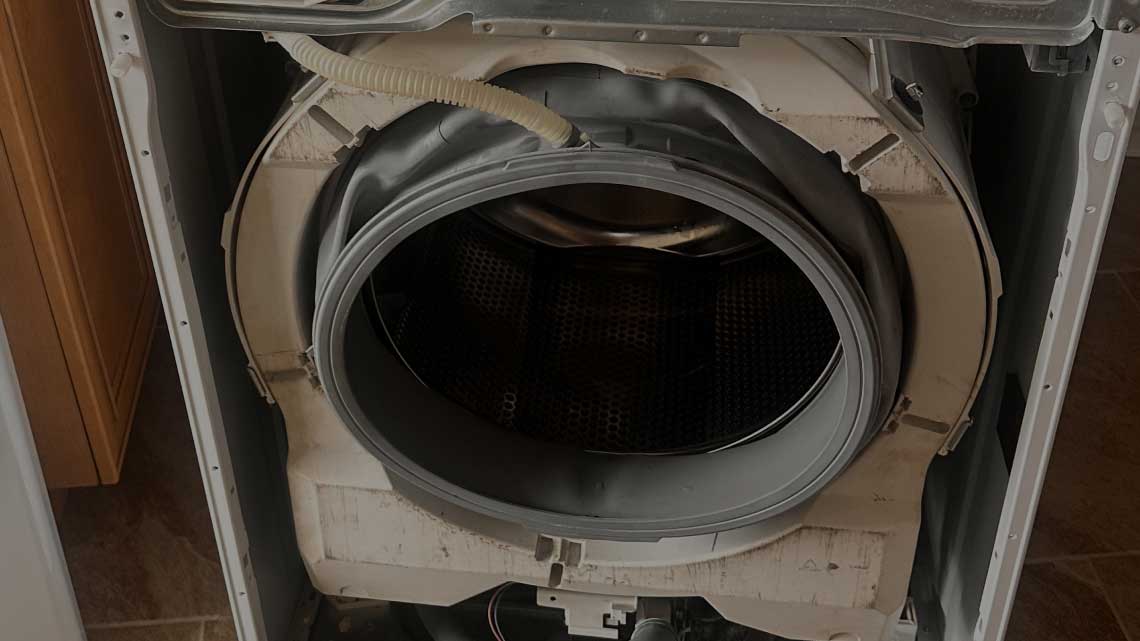
- The gasket is held on by two spring clamps — an outer one securing it to the front panel of the cabinet, and an inner one holding it to the outer tub. On most machines you need to remove the top panel, sometimes the front panel, and occasionally the control assembly to reach the inner clamp.
- The outer clamp comes off with a flathead screwdriver or a clamp tool. The inner clamp lives deep behind the drum opening and is the part that makes this job annoying — it’s a wire spring under high tension in a tight space, and it wants to launch across the room when it releases.
- Then the old gasket peels off, you clean the mounting lip of years of gunk, and seat the new gasket into the tub groove. There’s usually an alignment mark that has to line up with a specific point on the tub — get it wrong and the drain holes end up in the wrong place, and the seal holds water where it shouldn’t.
Reinstall the inner clamp, re-seat the outer lip against the cabinet, reattach the outer clamp, put the panels back, and run a test cycle watching for leaks.
Typical time for a tech: about an hour, sometimes ninety minutes on a tightly packed Samsung or LG.
DIY or Call a Tech?
Honest assessment. If you’re comfortable pulling panels, you have the right clamp tool, and you can find a model-specific video for your exact machine — it’s doable. People do it.
- Where it goes wrong: the inner spring clamp is genuinely difficult and can pinch fingers badly. Misaligning the gasket means it leaks and you get to do the whole job again. And on some models the door lock assembly and wiring have to come out first, which adds electrical work to the mix.
- The other consideration is diagnosis. If the leak isn’t actually the gasket — and sometimes it isn’t — you’ve spent money and half a Saturday on the wrong part. SRQ Appliance Repair techs confirm the source first, then replace. If your leak turns out to be a drain pump or an inlet valve, you find that out before you buy a gasket.
For anyone who’d rather not spend the afternoon wrestling a spring clamp, a same day washer repair tech typically handles the whole thing in one visit with the gasket on the truck.
Making the New Gasket Last
A fresh seal in Sarasota lasts as long as your habits let it.
- Leave the door open after every load. Every single one. Air has to circulate or the folds stay wet and mold restarts immediately. This is the single most important thing you can do.
- Wipe the bottom fold dry after the last load of the day. Thirty seconds with a rag. That lower crease is where water pools and where mold always starts.
- Cut your detergent in half and use HE soap in an HE machine. Excess suds leave a film on the rubber, and that film is mold food.
- Stop using liquid fabric softener. It’s scented oil that coats the gasket and feeds growth. Wool dryer balls do the same job without the residue.
- Run a tub-clean cycle monthly with bleach or a washer cleaner tablet. In this humidity, that’s not optional maintenance — it’s the difference between a gasket that lasts eight years and one that lasts four.
- Check pockets before washing. Coins and underwires are what cut the rubber in the first place.
Name:
SRQ Appliance Repair
Address:
3959 Yellowstone Cir Sarasota 34233
Phone:
(941) 233-0641
Website:
https://srq-appliancerepair.com/
Hours:
Mon-Fri: 8:00 a.m. – 7:00 p.m.
Sat: 10:00 a.m. – 2:00 p.m.
Sun: Closed
Frequently Asked Questions

Hi Sarasota! My name is Vitalii. I’ve been repairing home appliances in Sarasota and the surrounding areas for many years. I know this field inside and out! Here I share my experience and practical tips. I’d truly appreciate your shares, questions, and comments. Thank you!