


Water on a laundry room floor doesn’t wait for you to figure out what happened. It goes under the baseboards, soaks into the subfloor, and if you’re on a second story — it goes through the ceiling below. I’ve been on appliance repair Sarasota calls where the washer leaked for two days before the homeowner noticed, and by then the floor was buckling.
So before you diagnose anything:
- Unplug the washer.
- Turn off both hot and cold supply valves behind the unit — righty tighty, all the way.
- Mop up the standing water. Get towels down.
- If there’s a floor drain, make sure it’s clear.
- If the water reached carpet or drywall, start a fan. You’re buying time for the structure while you figure out the machine.
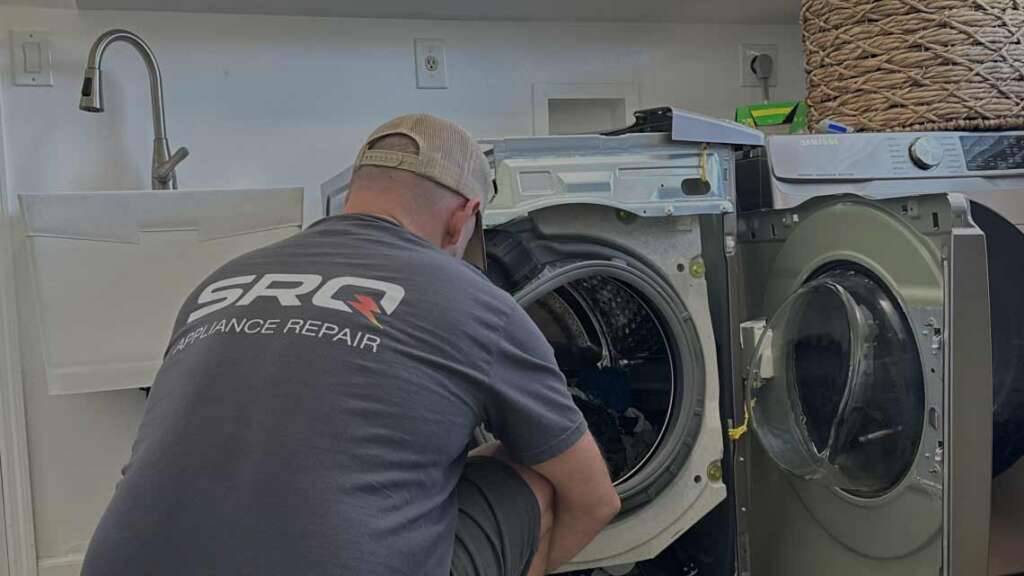
Now. Where’s the water actually coming from? That’s the whole question, and it matters WHEN the leak happens just as much as WHERE.
1. Hoses: The Obvious One Nobody Checks
I’m going to start here because fill and drain hoses cause more washer leaking from bottom calls than everything else combined. And they’re the easiest to fix.
- Pull the machine out from the wall.
- Look at the back. You’ve got two fill hoses — hot and cold — running from the wall valves to the back of the washer. And a drain hose that loops up and drops into a standpipe or laundry sink.
- Check every connection point. Hand-tight isn’t always tight enough, and washers vibrate a lot. Over months those connections loosen a quarter turn and start weeping. Tighten them.
- Check the rubber washers inside the hose fittings — flat little rings that dry out, crack, and stop sealing. Replace them. They cost nothing.
- Now look at the hoses themselves.
- Rubber fill hoses get brittle after five years. I’ve seen them bulge like a garden hose in the sun and then pop. Braided stainless steel hoses last longer and don’t burst the same way.
- If your hoses are original and the washer is more than five years old, swap them out. Twenty bucks for a pair. Cheapest insurance you’ll ever buy.
- The drain hose is a different animal. Look for kinks, cracks, and where it connects to the pump at the bottom of the machine. That clamp loosens over time. Drip, drip, drip — right onto the floor where it pools and looks like the whole machine is dying. It’s just a clamp.
2. Drain Pump Failure
The drain pump lives at the bottom of the washer — front-loaders usually have it behind a small access panel at the lower front, top-loaders put it underneath. Its job: push dirty water out through the drain hose at the end of each cycle.
When the pump cracks, loses a seal, or the impeller breaks, water leaks out during the drain phase. You’ll notice the timing: floor is dry during fill and wash, puddle appears during drain or spin.
- Pull the access panel and look at the pump while the machine runs.
- Yes, it’s messy. Lay towels.
- If you see water dripping from the pump body or where the hoses connect to it — there’s your problem.
Small debris — coins, bobby pins, that random LEGO — can puncture the impeller housing or jam the pump so it burns out the seal. I’ve pulled a underwire bra piece out of more drain pumps than I can count.
3. Tub Seal Gone Bad
The tub seal sits where the transmission shaft or basket shaft enters the outer tub. On top-loaders it’s underneath the machine, on front-loaders it’s behind the inner drum. Its job is to keep water inside the tub and away from the bearings and motor. When it fails, water seeps out slowly — not a gush, more of a steady drip that shows up as a puddle centered underneath the machine.
This is not a fun DIY job.
- On top-loaders you’re pulling the transmission.
- On front-loaders you’re removing the drum.
Either way it’s a half-day project and you need to replace the bearings at the same time since the water that got past the seal has likely been chewing on them for weeks. If the machine is over ten years old, I usually tell people to think hard about whether the repair makes sense. That’s about a third of a new washer.
4. Door Seal on Front-Loaders
Front-load washers have a rubber boot gasket — the big accordion-shaped seal between the door and the tub. It flexes every time the drum spins and takes a beating from zippers, buttons, and loose change. When the boot tears, water leaks from the front of the machine and runs down to the bottom. Sometimes the tear is obvious — a visible rip or a flap hanging loose. Sometimes it’s a pinhole you can only find by running a cycle and watching the seal from inches away with a flashlight.
Florida humidity plus a closed washer door after every load equals black mold in the folds within months. Once the mold eats into the rubber deep enough, it compromises the seal. Had a customer near Siesta Key who couldn’t beat the mold no matter how much she cleaned — it turned out the rubber was pitted so badly it was wicking water through. Appliance repair in Sarasota FL techs do these constantly — it’s one of the top three front-loader repairs in this market.
5. Water Inlet Valve Dripping
The inlet valve sits at the back of the machine where the fill hoses connect. Two solenoids — hot and cold — open when the washer calls for water and close when it’s full. When a solenoid fails in the partially-open position or the valve body cracks, water leaks from the back and runs underneath.
The sneaky version: the valve leaks only when the machine is OFF. Water pressure from the house supply slowly pushes past a worn solenoid seat and fills the tub when nobody’s watching. You come back hours later and there’s a puddle. This is the “faulty valve stuck open” scenario — had a call just like it last month in Palmer Ranch where the homeowner found water pooling every morning.
Repair process:
- Turn off the supply valves and disconnect the hoses.
- Look at the valve body for cracks and mineral buildup.
- If it’s leaking from the body, replace the whole valve.
- If it’s just the connection point, new rubber washers in the hose fittings might do it.
6. Overloading and Too Much Detergent
Not every leak is a broken part. Overstuffing a front-loader pushes water past the door seal during spin. Excess detergent — especially non-HE soap in an HE machine — creates a mountain of suds that overflows through the dispenser tray or the door seal. Water runs down the front, collects underneath. Looks like a mechanical failure. It’s not.
- Use HE detergent in HE machines. Half the amount you think you need. Seriously — most people use way too much.
- And don’t pack the drum past 75 percent. Leave room for the clothes to move.
If the leak stops after you cut the soap and load size, you just saved yourself a service call.
Front Load vs. Top Load — Different Leak Points
Both types share inlet valve and drain hose issues. If the water shows up at the back, start with hoses and valves. If it’s at the front, start with the door seal and pump.
When to Call A Pros
DIY:
Hose tightening, rubber washer replacement, cleaning the pump filter, reducing soap — all DIY. It takes ten minutes. Fixes more than half the leaks I get called for.
But if you’ve dried the floor, run a cycle, and the water’s coming from underneath the machine itself — not from a hose connection, not from the door — you’re looking at a pump, tub seal, or valve job. Those need tools, parts, and experience.
A same day washer repair tech can pinpoint the source in fifteen minutes. Most common parts are on the truck. One visit, done. And for the middle-of-the-night “I just found a lake in my laundry room” moments — emergency washer repair gets someone to your door before the subfloor damage gets expensive.
Name:
SRQ Appliance Repair
Address:
3959 Yellowstone Cir Sarasota 34233
Phone:
(941) 233-0641
Website:
https://srq-appliancerepair.com/
Hours:
Mon-Fri: 8:00 a.m. – 7:00 p.m.
Sat: 10:00 a.m. – 2:00 p.m.
Sun: Closed
Frequently Asked Questions

Hi Sarasota! My name is Vitalii. I’ve been repairing home appliances in Sarasota and the surrounding areas for many years. I know this field inside and out! Here I share my experience and practical tips. I’d truly appreciate your shares, questions, and comments. Thank you!